A garden shed is one of the most practical and rewarding additions you can make to your outdoor space. Whether you need a simple storage solution for your gardening tools or a larger hobby shed to transform into a workshop or creative studio, constructing a garden shed can be a fulfilling project.
However, planning, building, and assembling a shed can also come with its fair share of challenges, from selecting the right materials to ensuring the structure is sturdy and weatherproof. This is why we have put together a quick guide on shed construction to give you an idea of what the project entails before you get started. Find steps, tips and expert advice below, or why not take the guesswork out of your self-build shed and order a garden shed with assembly included from BTL Timber?
Building a Garden Shed in 5 Steps
At first glance, building a garden shed might seem like a daunting task, but by following a clear process, you can achieve a sturdy and attractive result. Whether you’re creating a small storage space or a larger self build shed for hobbies or workshop use, taking your time at each stage will make all the difference.
Step 1: Preparing the Base/Foundation
Every successful shed construction project begins with a solid base. A stable, level foundation is essential to prevent future issues like sagging floors or warped walls. You have a few options when it comes to bases: a concrete slab is the most durable and provides long-term stability, making it ideal for larger or heavier sheds. Paving slabs are a quicker and easier option for smaller garden sheds, while a timber frame base offers a lightweight, raised solution, especially helpful if your garden has uneven ground. Whichever base you choose, take the time to clear the area thoroughly and check for level using a spirit level. A strong, even base will give your self-built shed the best possible start.
Step 2: Constructing the Floor
With your base complete, the next step is constructing the floor. Many prefabricated sheds come with a floor panel included, but if you're building a garden shed completely from scratch, you’ll need to build a floor frame from treated timber joists. This frame should be securely fixed together, square, and level. Once the frame is in place, timber floorboards or strong plywood sheeting can be attached to create the walking surface. It’s a good idea to apply a wood preservative at this stage to protect against moisture, especially if the shed will be used year-round. A strong and properly finished floor provides the platform for the rest of your shed construction.

Step 3: Building the Walls
With the floor ready, you can move on to building the walls. Typically, the walls are first constructed as individual frames while laid flat on the ground. Once each frame is assembled, you can lift it into position and temporarily brace it upright. It's crucial to ensure the corners are square and the walls are level, as any inaccuracies at this stage can affect the whole structure. After the frames are secured, the external cladding can be attached. Using high-quality cladding, such as tongue-and-groove boards, gives a neat, weather-resistant finish that not only looks fantastic but also helps protect the shed from the elements. As the walls go up, your self-built shed will really start to take shape.
Step 4: Adding the Roof
The next major stage in constructing a garden shed is fitting the roof. There are various styles to choose from depending on your needs and aesthetic preferences. A gable roof, with two sloping sides meeting in a peak, offers a traditional look and plenty of headroom, while a pent roof, with a single gentle slope, gives a modern, compact feel. Roof trusses or support beams should be securely fixed to the wall frames before you attach the roofing panels or boards. Once the basic structure is in place, covering the roof with a waterproof membrane or roofing felt is essential to protect your new shed from rain and damp. Properly sealing and securing the felt, especially along the edges, will ensure your shed stays dry and comfortable inside.
Step 5: Doors, Windows, and Finishing Touches
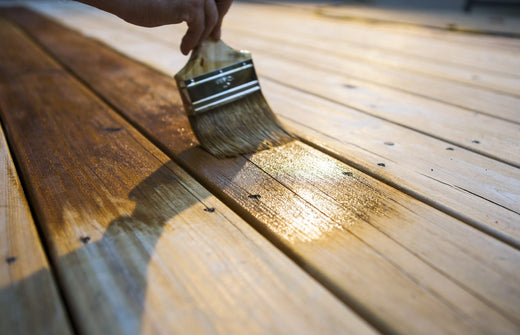
Finally, it's time to install doors, windows, and add the finishing touches that turn your shed into a functional, attractive space. If you’re fitting a pre-hung door, ensure it is aligned squarely within the frame to avoid sticking or gaps. Adding windows is a great way to introduce natural light, which is particularly useful if you plan to use your shed as a hobby space or workshop. Don't forget to think about security; installing a strong lock will help protect your belongings. To finish off your garden shed, apply a good-quality exterior wood treatment or paint. This not only enhances the appearance of your shed but also extends its life by protecting it against weather damage. With the structure complete and your finishing touches applied, you’ll have a shed that’s ready for years of use.

Let BTL Timber Build Your Perfect Garden Shed
Building a garden shed yourself can be a highly satisfying project, but it does require careful planning, the right tools, and a fair bit of time and effort. From preparing the perfect base to making sure every panel is square and secure, there’s a lot that goes into shed construction, and small mistakes can lead to big frustrations later on.
If you want the benefits of a beautiful, durable garden shed without the hard work and stress of a self-build, BTL Timber is here to help. We offer an extensive range of garden sheds, from compact storage sheds to spacious hobby workshops, all crafted from high-quality materials and designed to last. Even better, professional assembly is included with every purchase, so you can sit back and relax while we do the heavy lifting.
Explore our full range of garden sheds today and find the perfect shed to complete your garden, no tools, no hassle, just great results. For more information, get in touch with our expert team.